We finally had some clear skies during the new moon over a weekend, and I got the opportunity to take the Seestar S50 and my usual rig to the dark site for some long overdue astrophotography. I’m a little late writing about this, as this trip was in early June. If I had to summarize my experience with the Seestar, whether it’s from my backyard or the dark site, I could do it with one word: convenience.
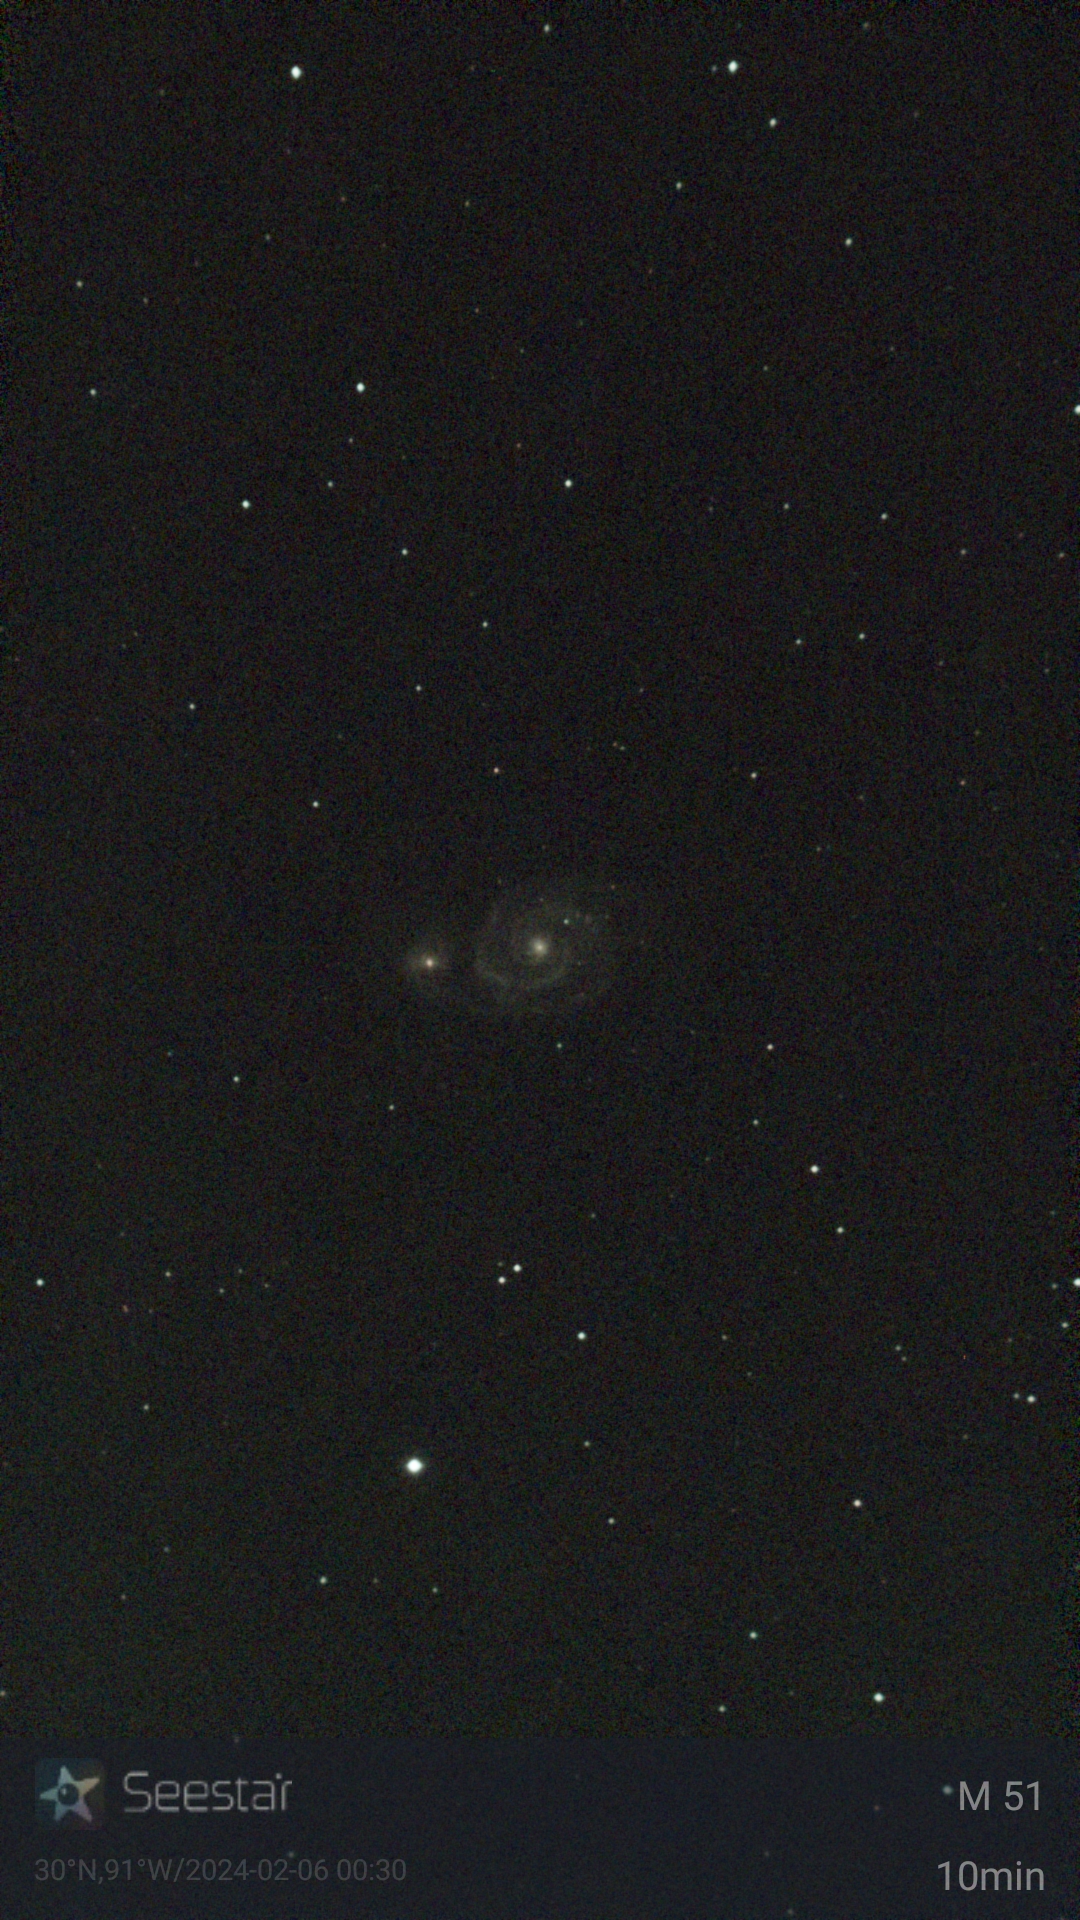
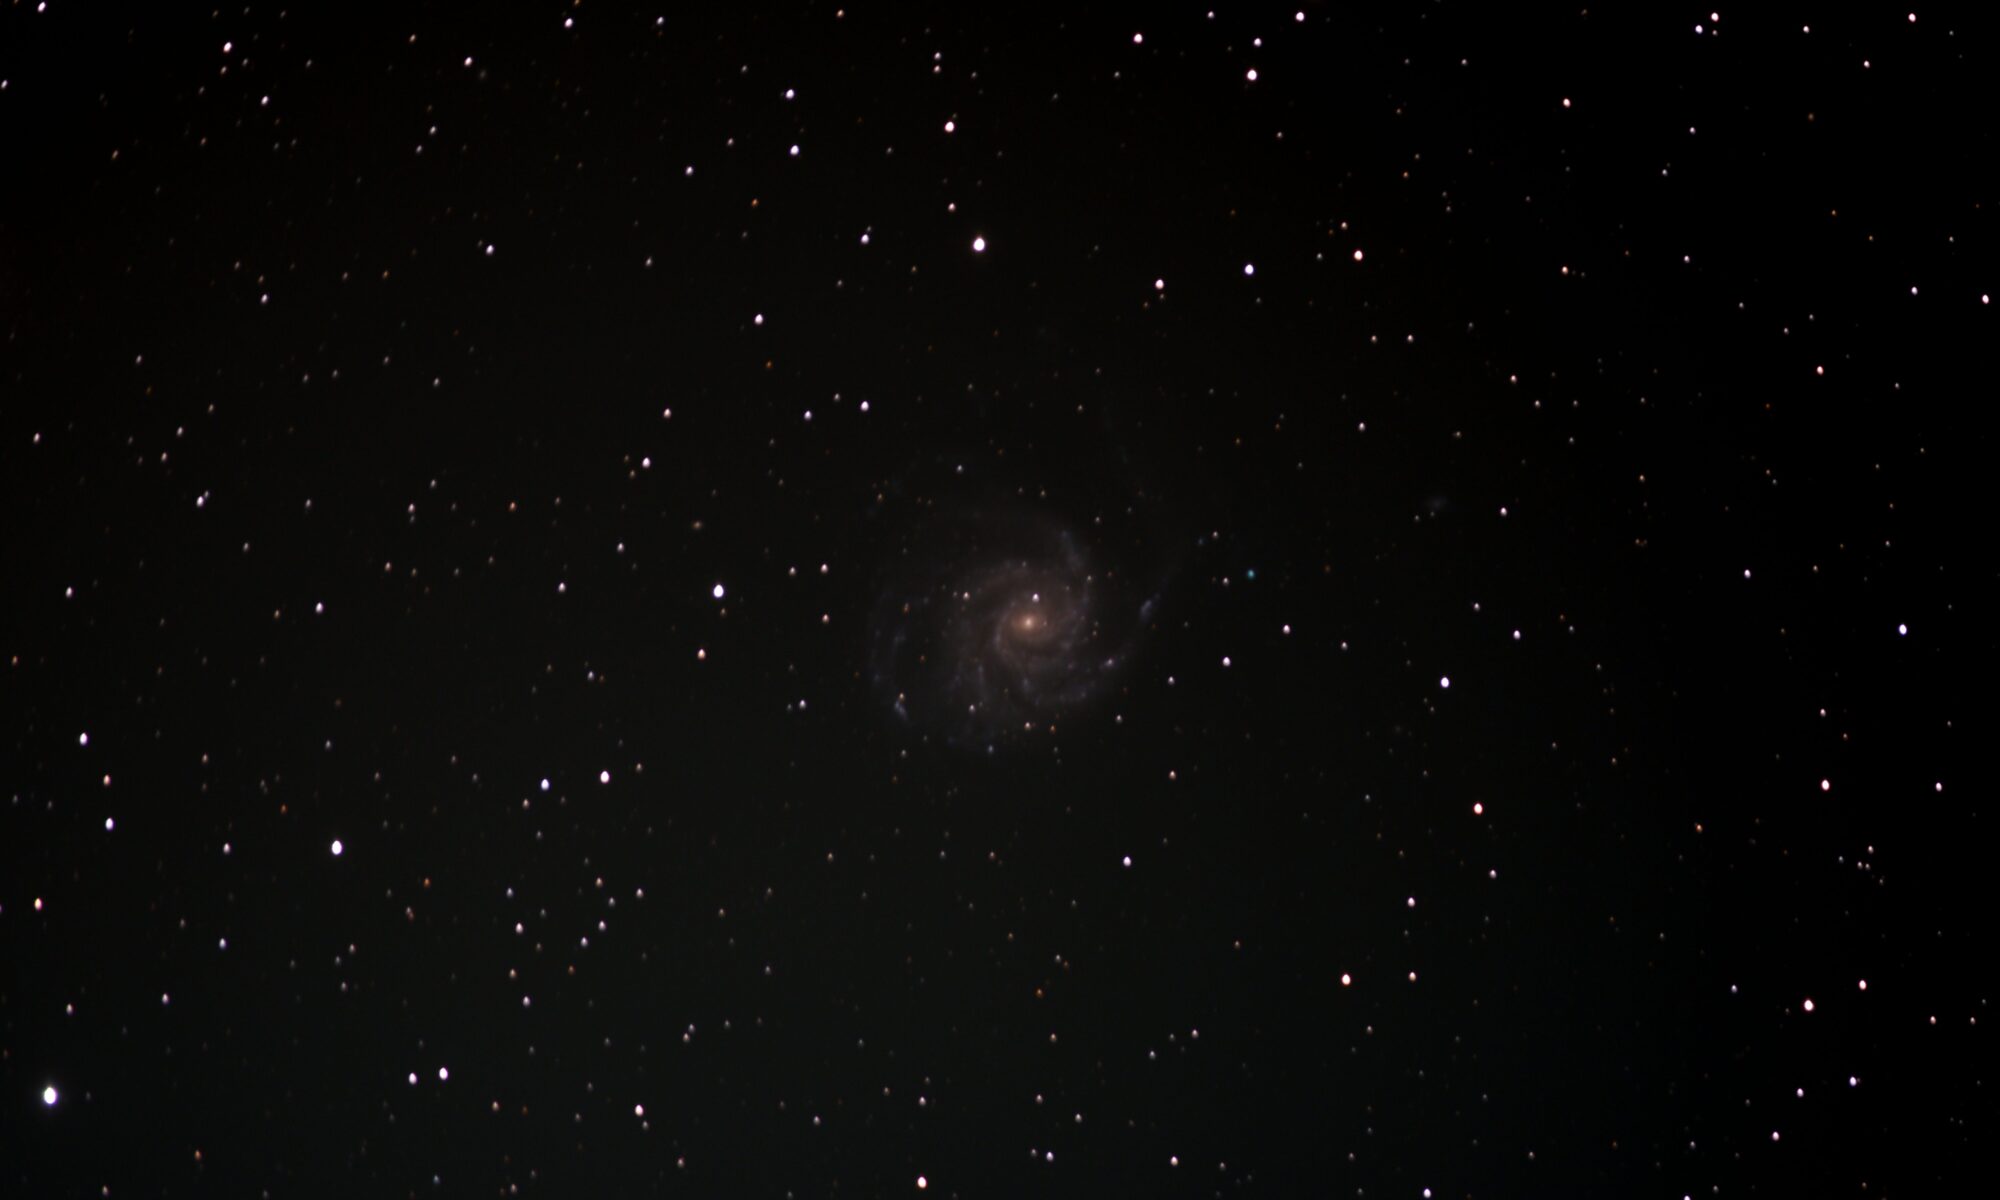
The little bugger is lightweight. It connects easily to my tablet or phone. It aligns it self. It finds objects. And it starts capturing data. I set it to grab images of Messier 51, the Whirlpool Galaxy, which is relatively bright and easy target, and let it run while stacking 20s images. While it was doing that, I wrestled with getting my Celestron 1100 EdgeHD going.
The evening didn’t start great for me. I began setting up my tables and gear and realized I forgot my power supply at home. I needed it to power my mount, so that meant a return trip home and cost about an hour of time. Fortunately, a friend was out there and watched my gear for me so I didn’t have to break it down and repack my vehicle.
Warding off mosquitos (mostly) and trying not to step in ant piles, I got the hefty scope going and powered up with the Hyperstar and my trusty Canon Eos RA attached. The Astrophotography Tool App was spitting out live images onto my new laptop screen. But, I ended up wasting another hour and a half trying to align the scope over the Skyportal app.
I went through the three-star alignment process half a dozen times, even powering the mount down and restarting the app. I swapped from the device I intended to use for the Skyportal app to using my phone. Eventually, I realized I was misunderstanding the language of the alignment process. It starts on star 0, not star 1. So the alignment kept failing because I was basically aligning on my first star, Polaris, twice.
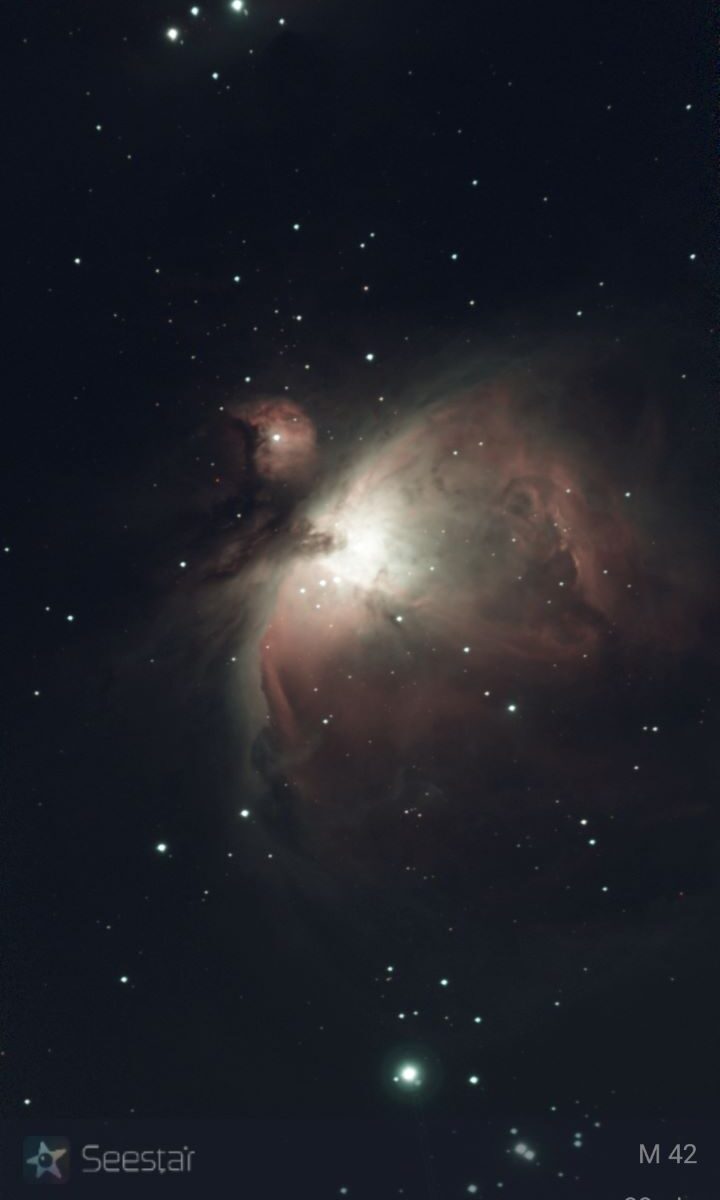
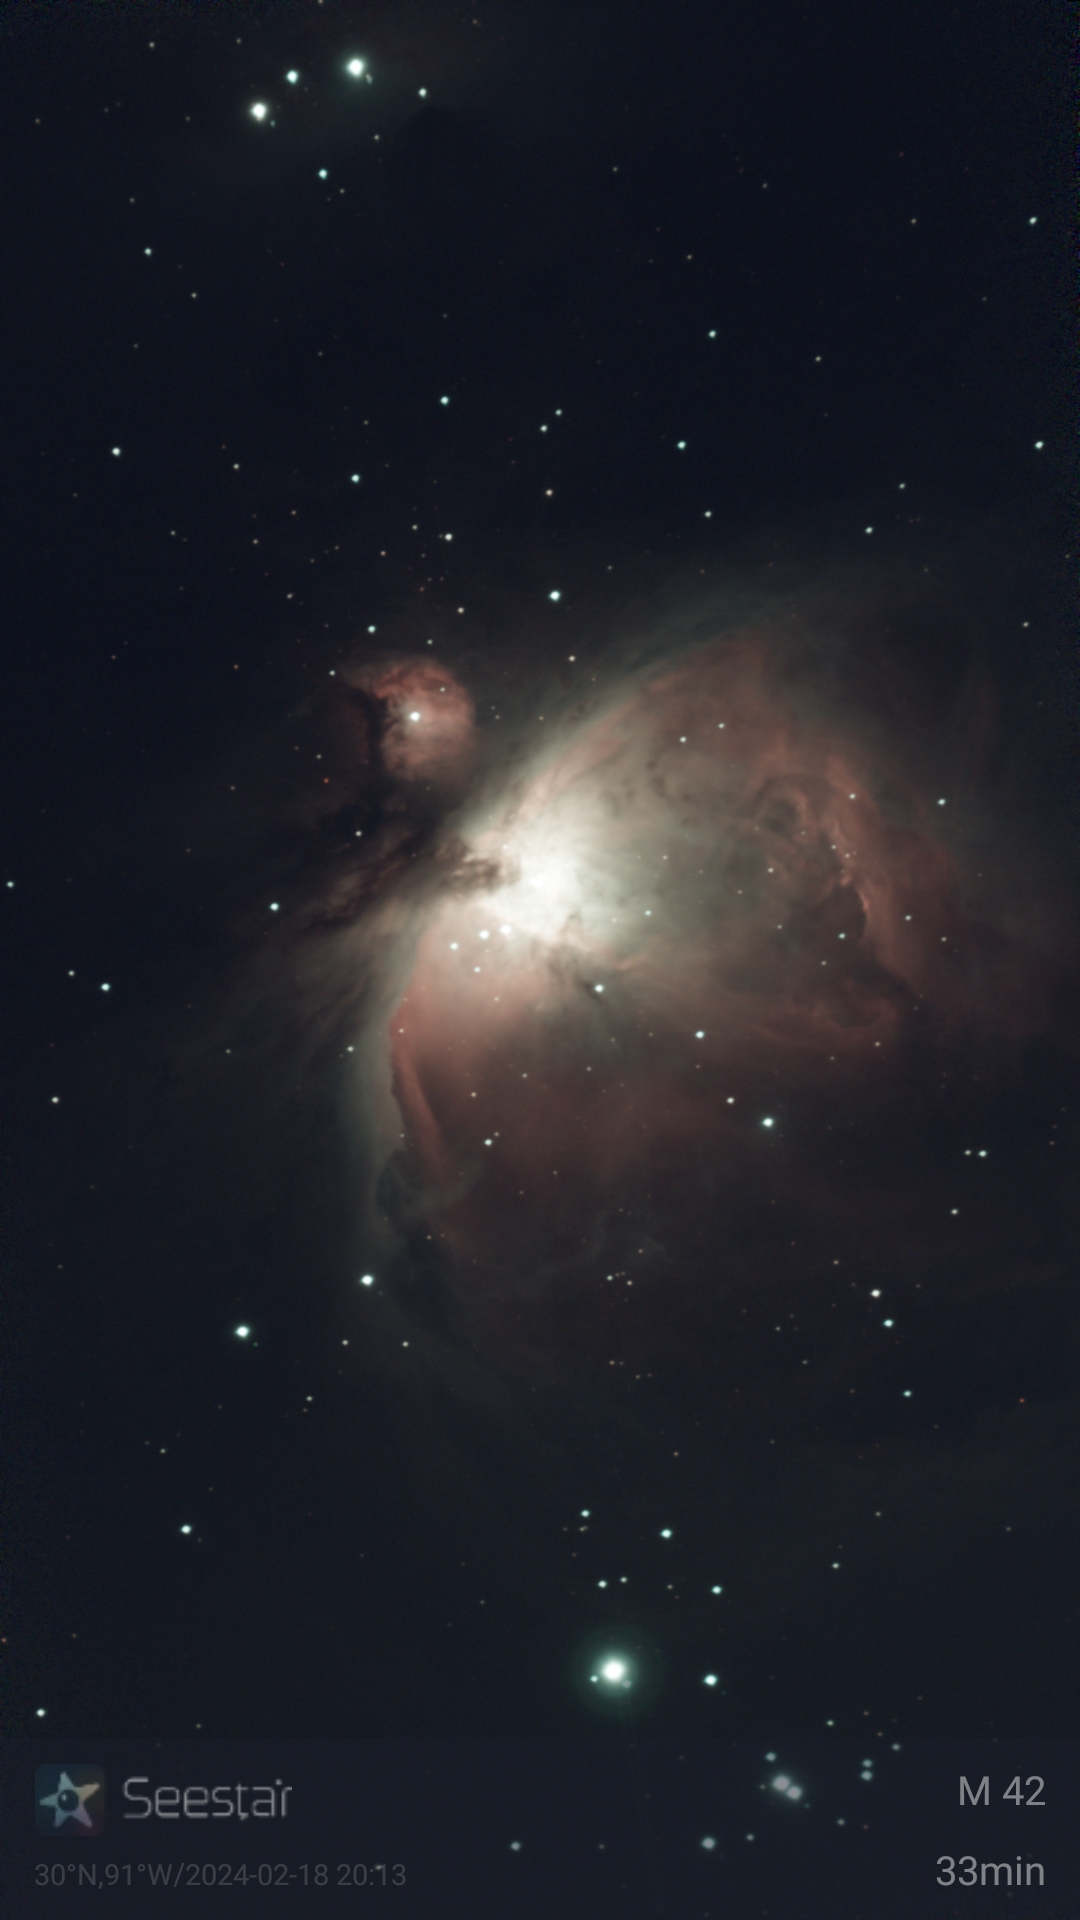
I was seriously aggravated, but I was able to get the big scope and my fancy DSLR snapping 30 second images of Messier 101, The Pinwheel Galaxy. During that ordeal with the setup, I kept checking the cheap Galaxy Tab tablet connected to my Seestar. I let the capture of the Whirlpool Galaxy run for half an hour. It was actually too much data. The picture below was what that looked like. I’m not sure how that satellite streak stayed in there.
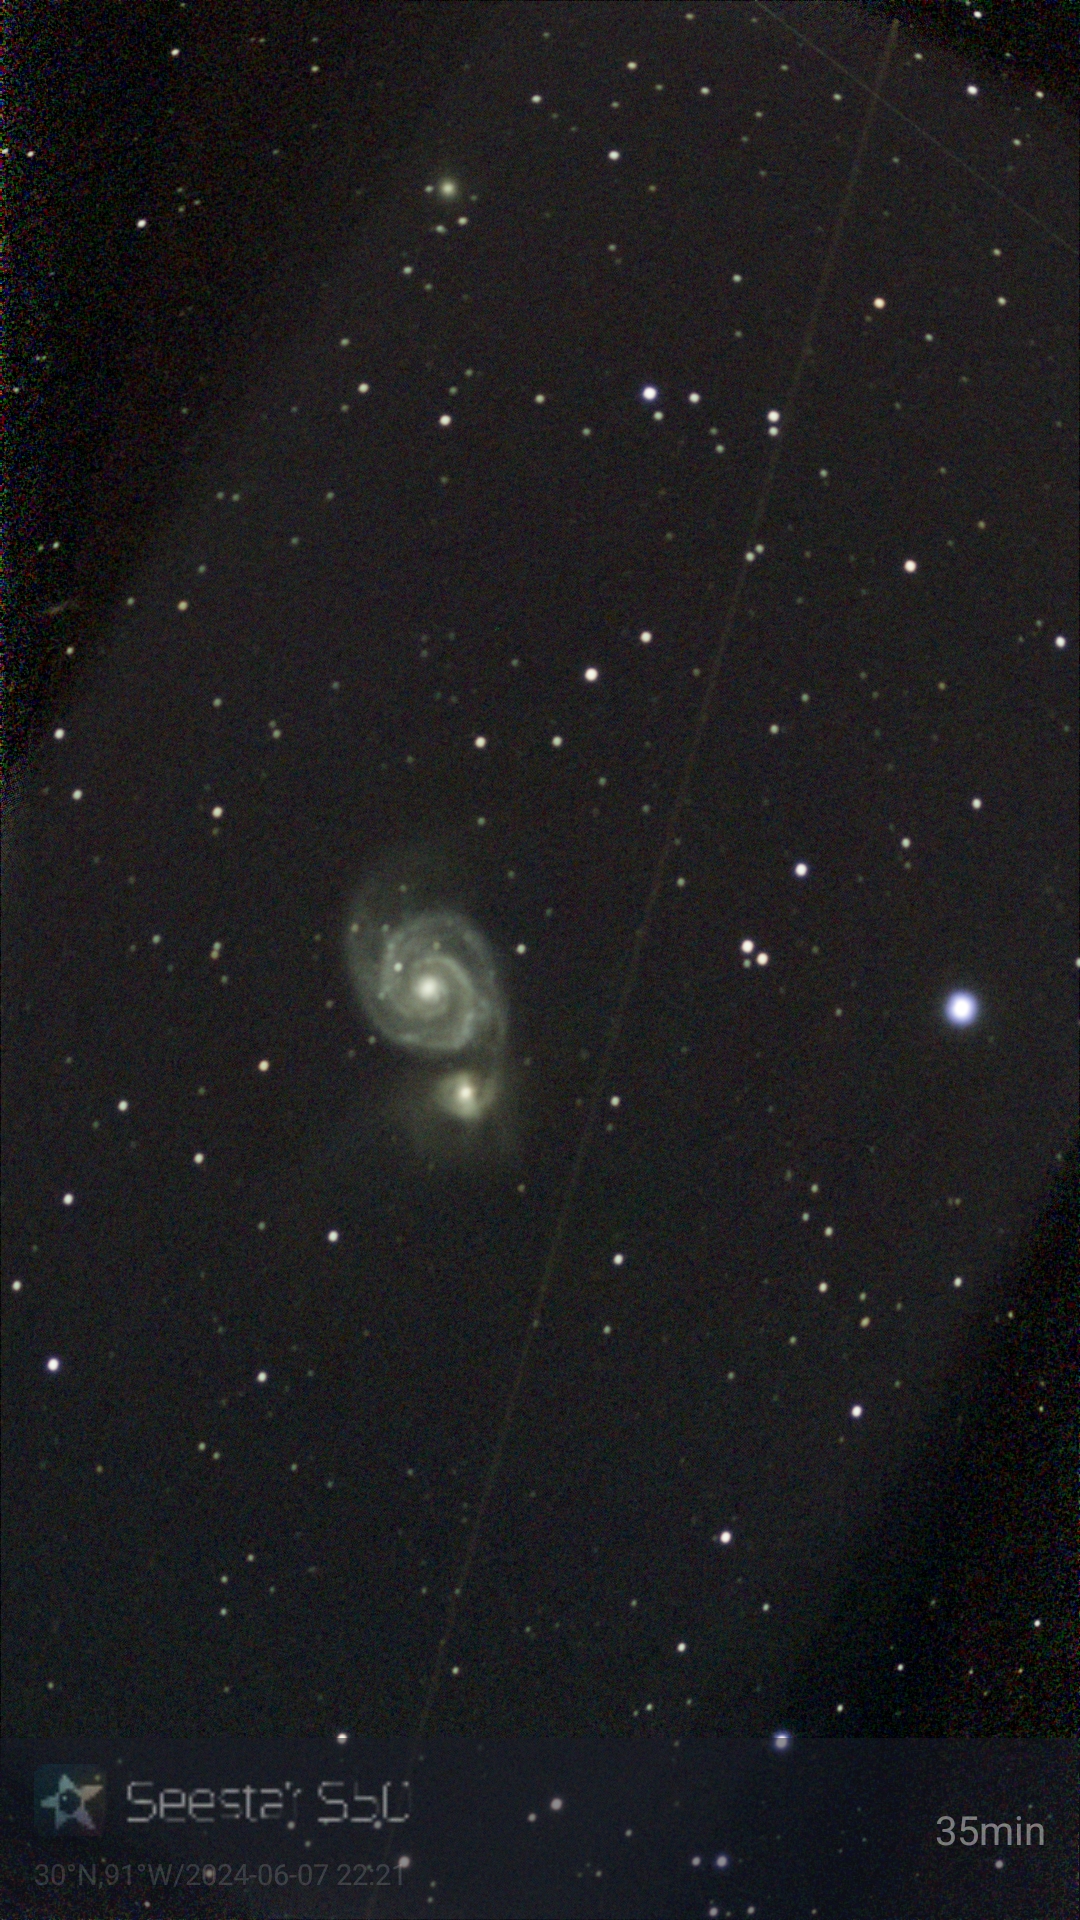
Like with all the Seestar images, I was able to touch up the final JPEG on my tablet/phone with the basic photo editing tools (the light balancing slider is awesome). The result is pretty rich with detail.
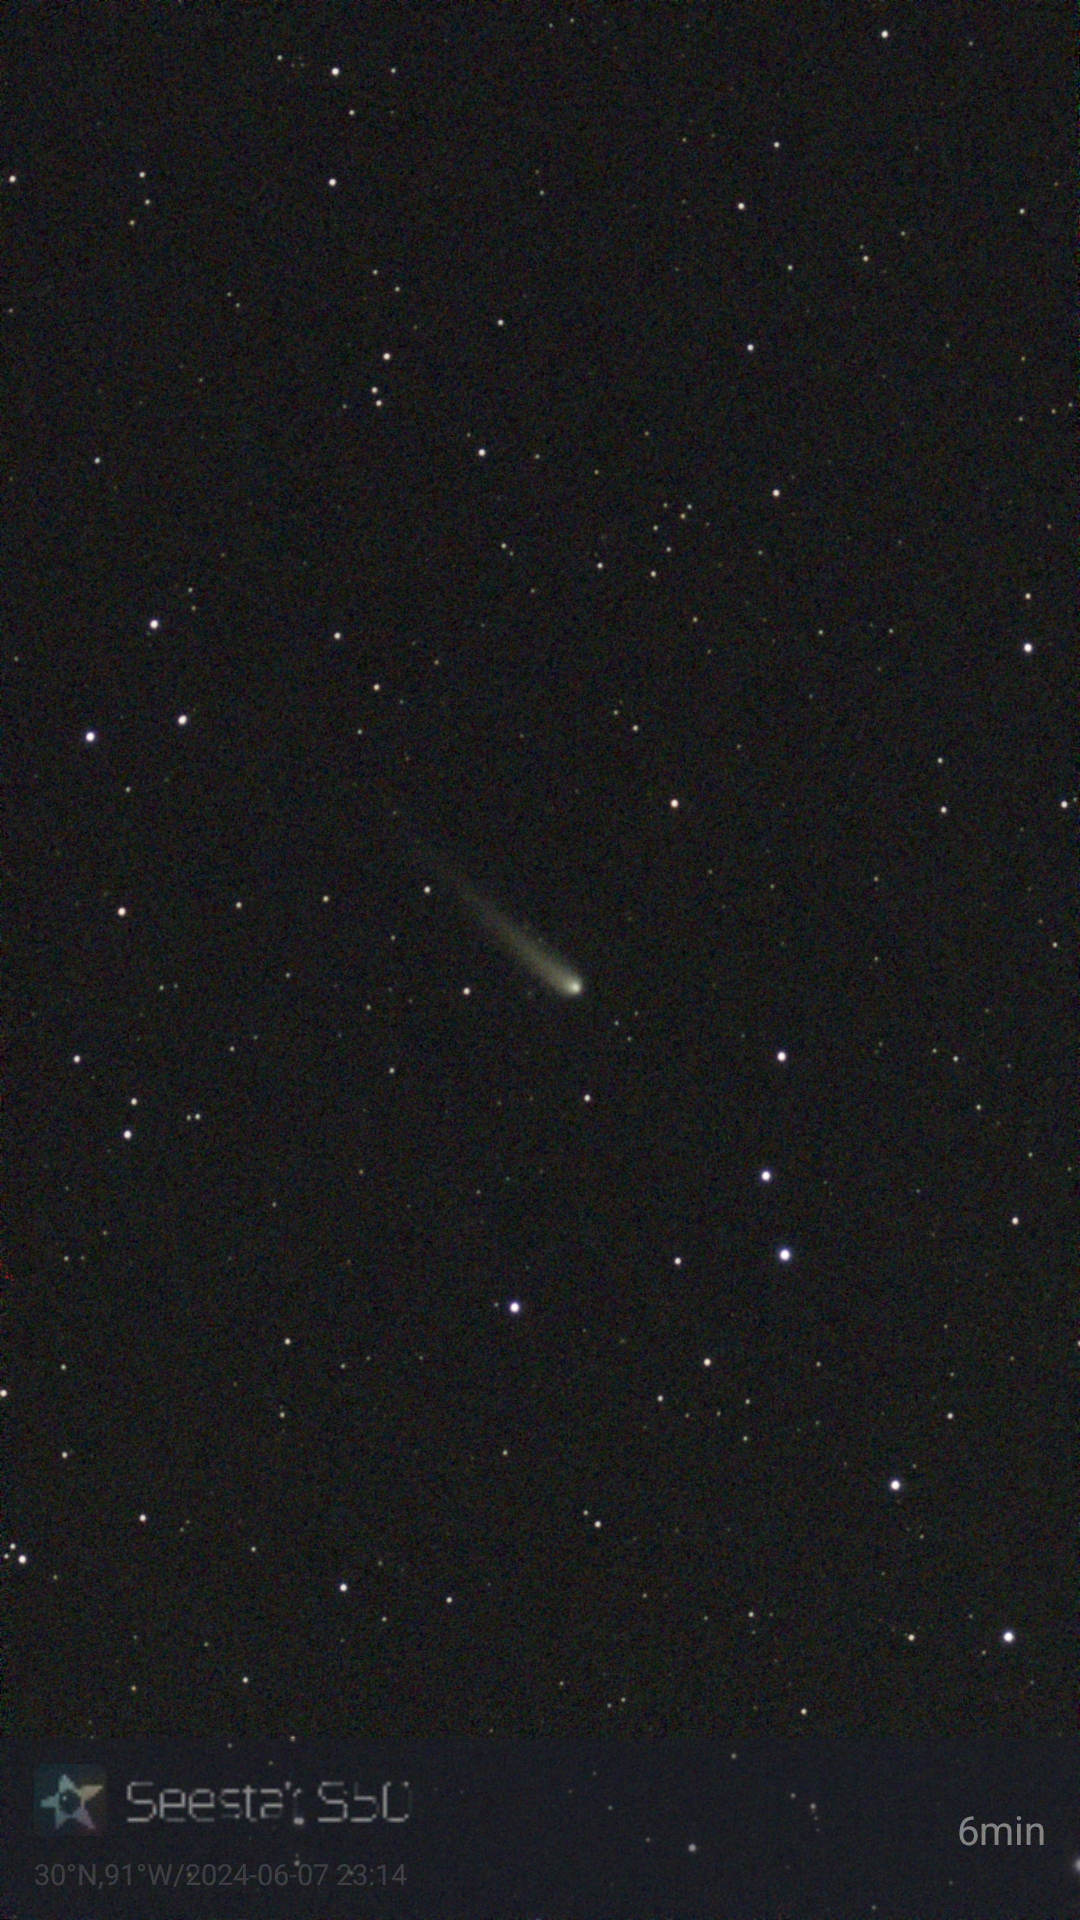
I navigated to a variety of other targets, seeing what else I could capture. The same friend that watched my gear suggested I try comet, Comet C/2023 A3 (Tsuchinshan-ATLAS). The comet was in the Seestar object library. It found it quickly and I was getting data back after only a few minutes. The image is a little grainy after 6 minutes of imaging, but still pretty good after a little on-device touching up.
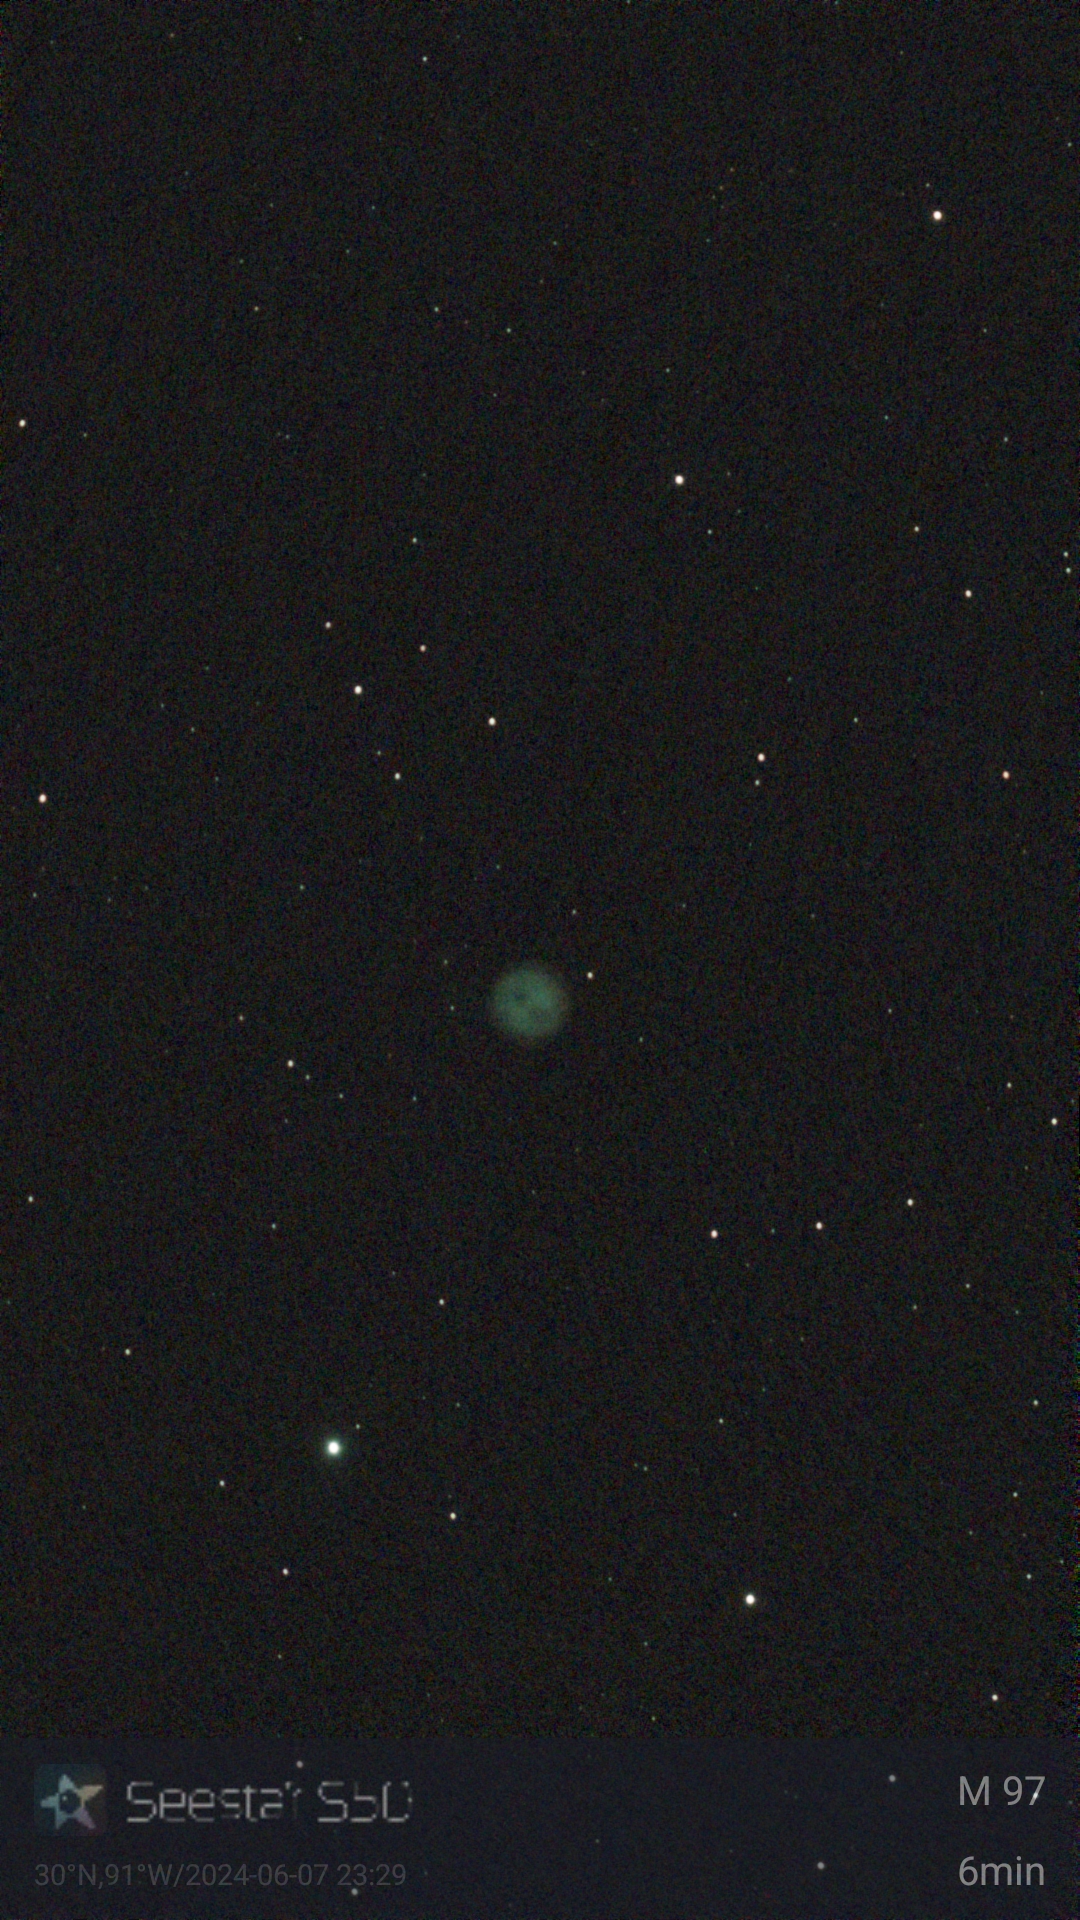
Comets aren’t large objects, so I thought to try a planetary nebula next, Messier 97, The Owl Nebula. I could capture it with my big scope with my ZWO planetary camera (assuming the USB cable doesn’t interfere with the Celestron Wi-Fi controller… that’s worth it’s own blog) and process it on my laptop, but that would have meant removing my DSLR, the Hyperstar, the counterweight, and reinstalling the secondary mirror just to capture this one target.
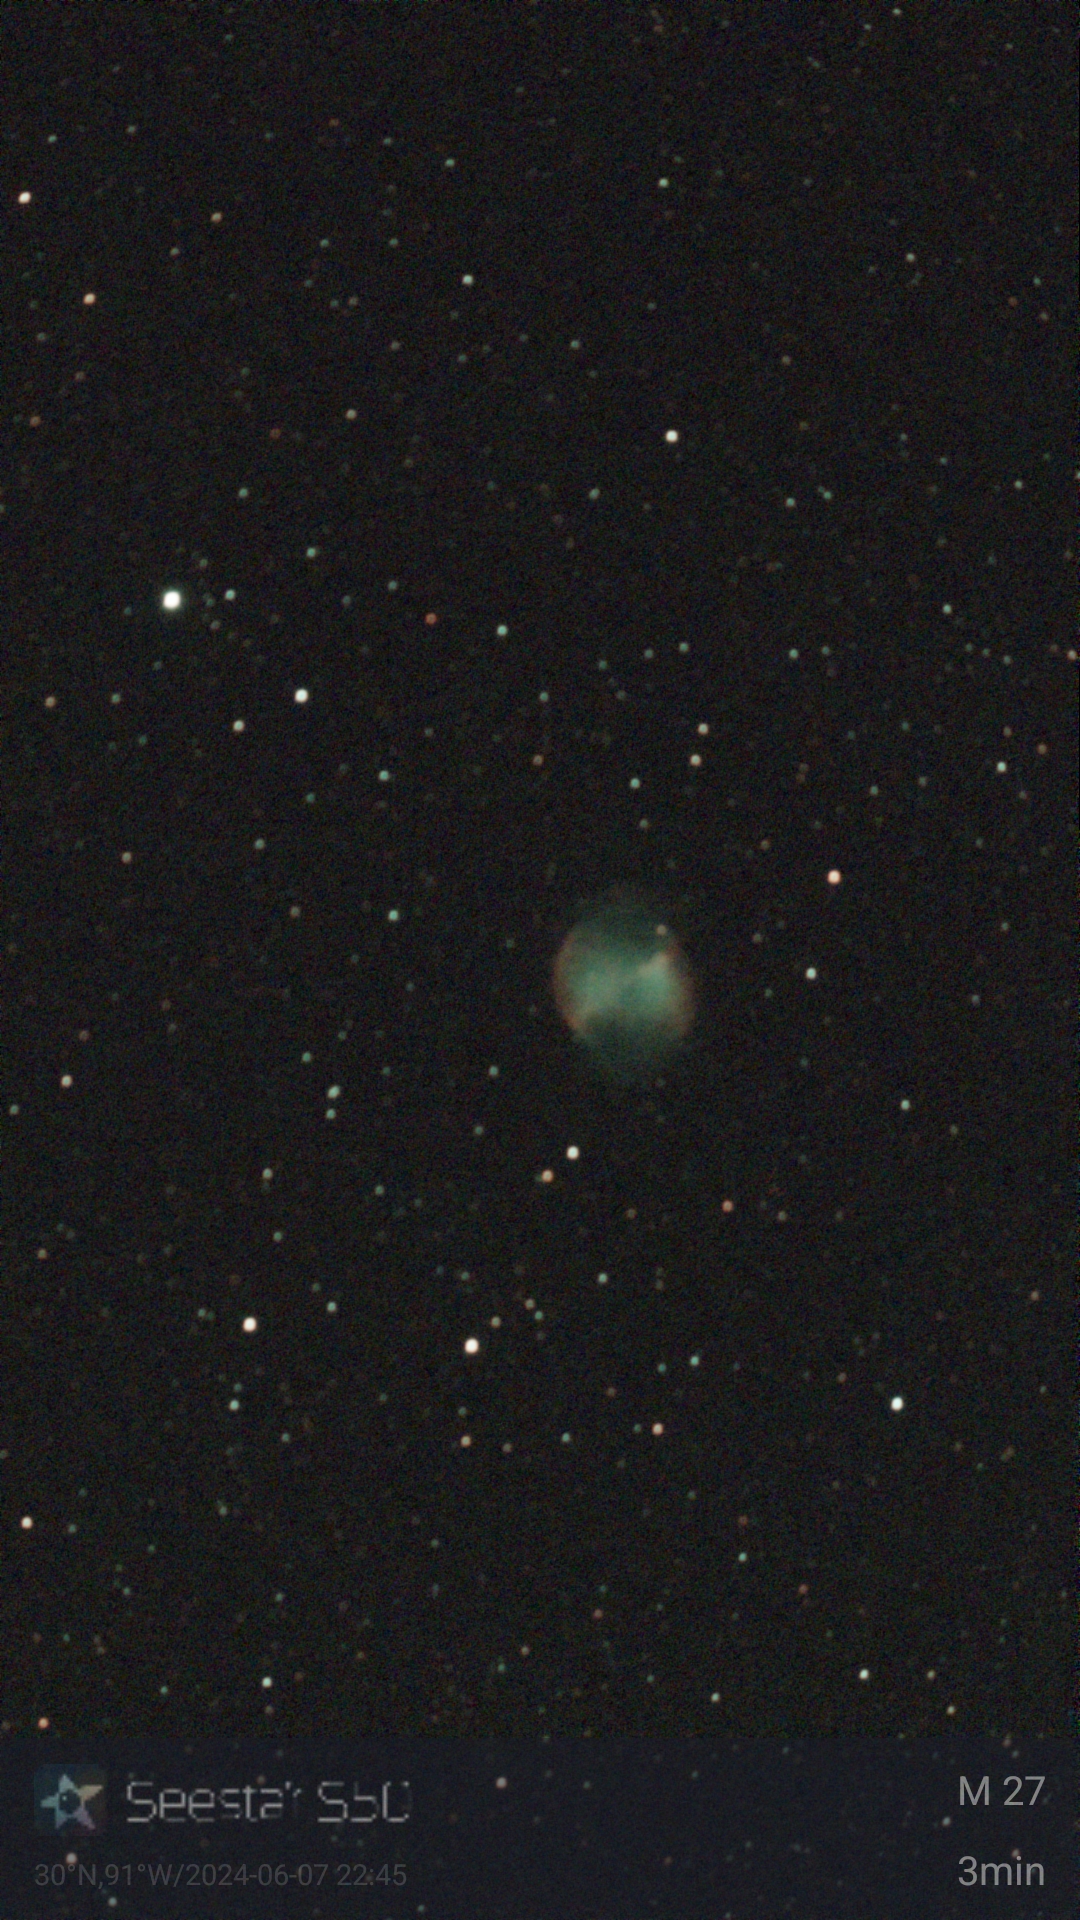
I moved onto some objects recommended to me in the Seestar app. Messier 27, The Dumbbell Nebula, came up and the Seestar started spitting out images. This is only after 3 minutes of 20 second images.
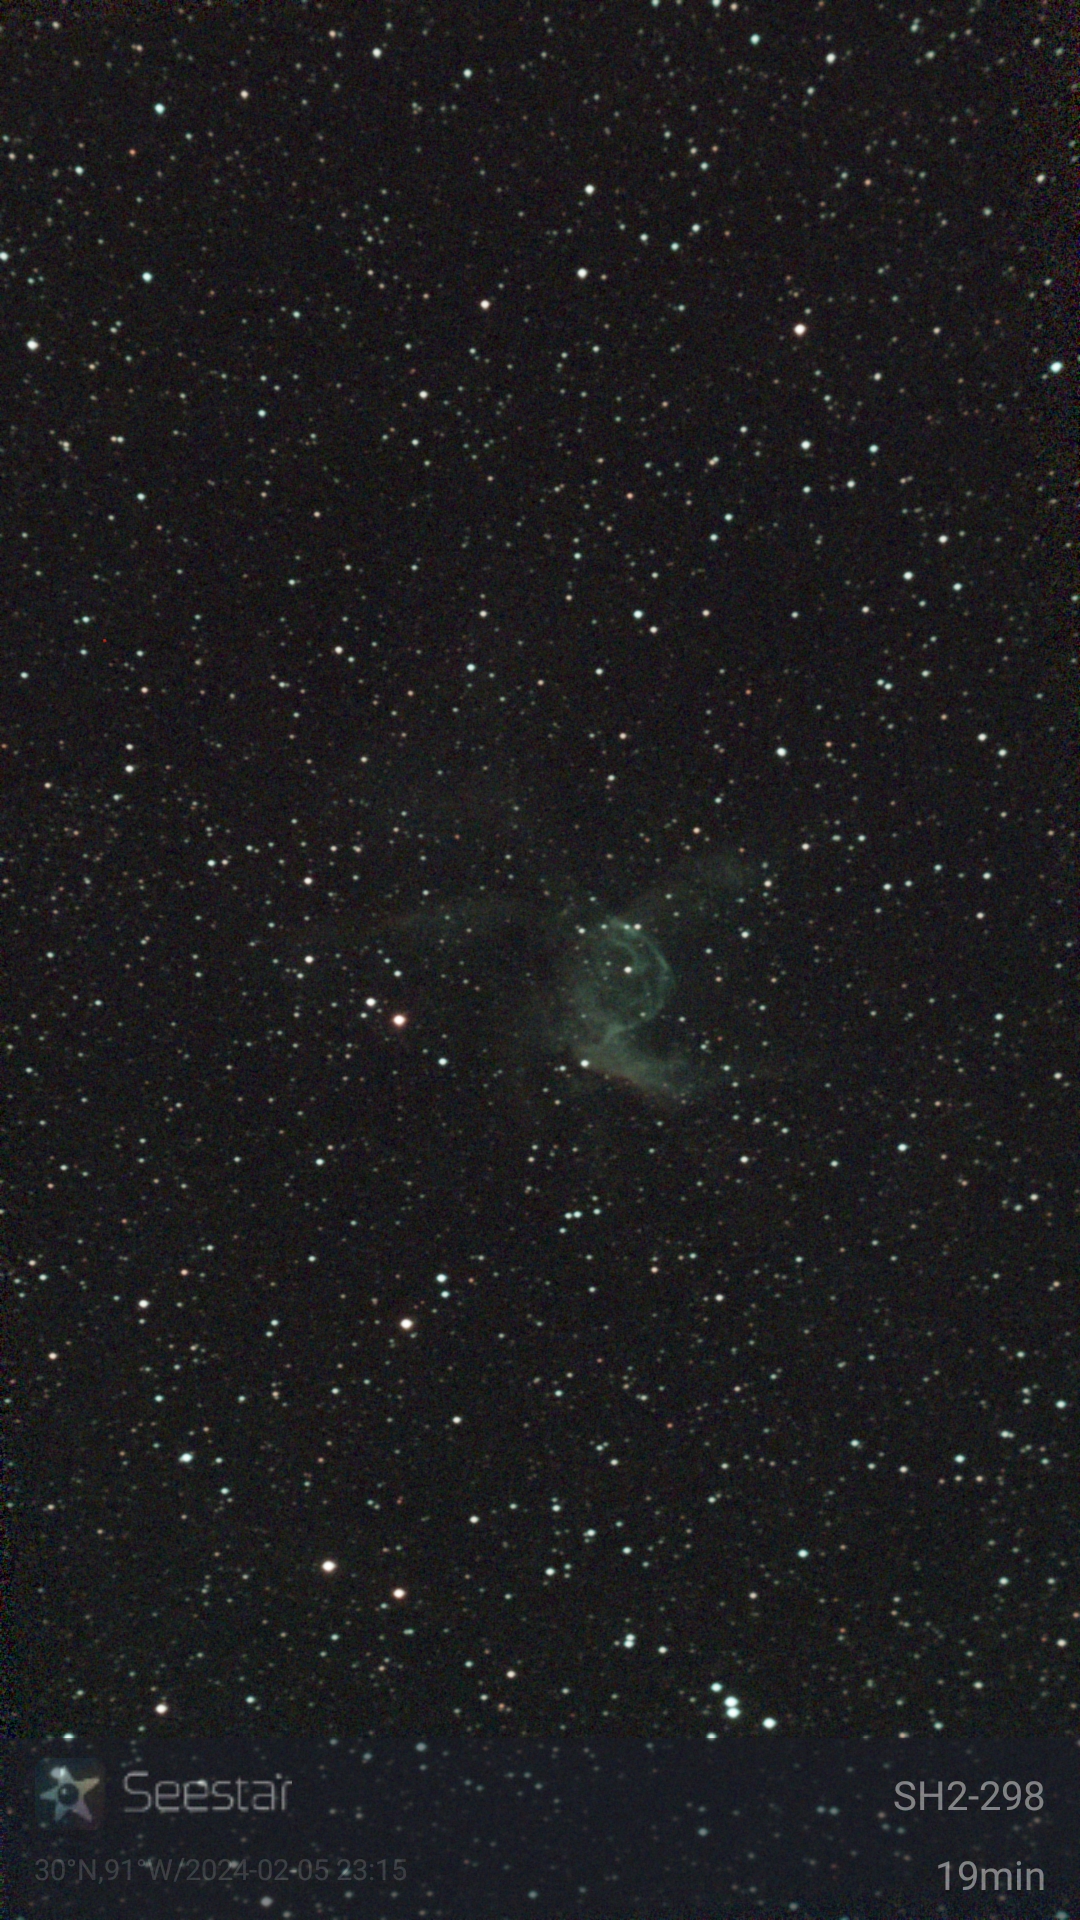
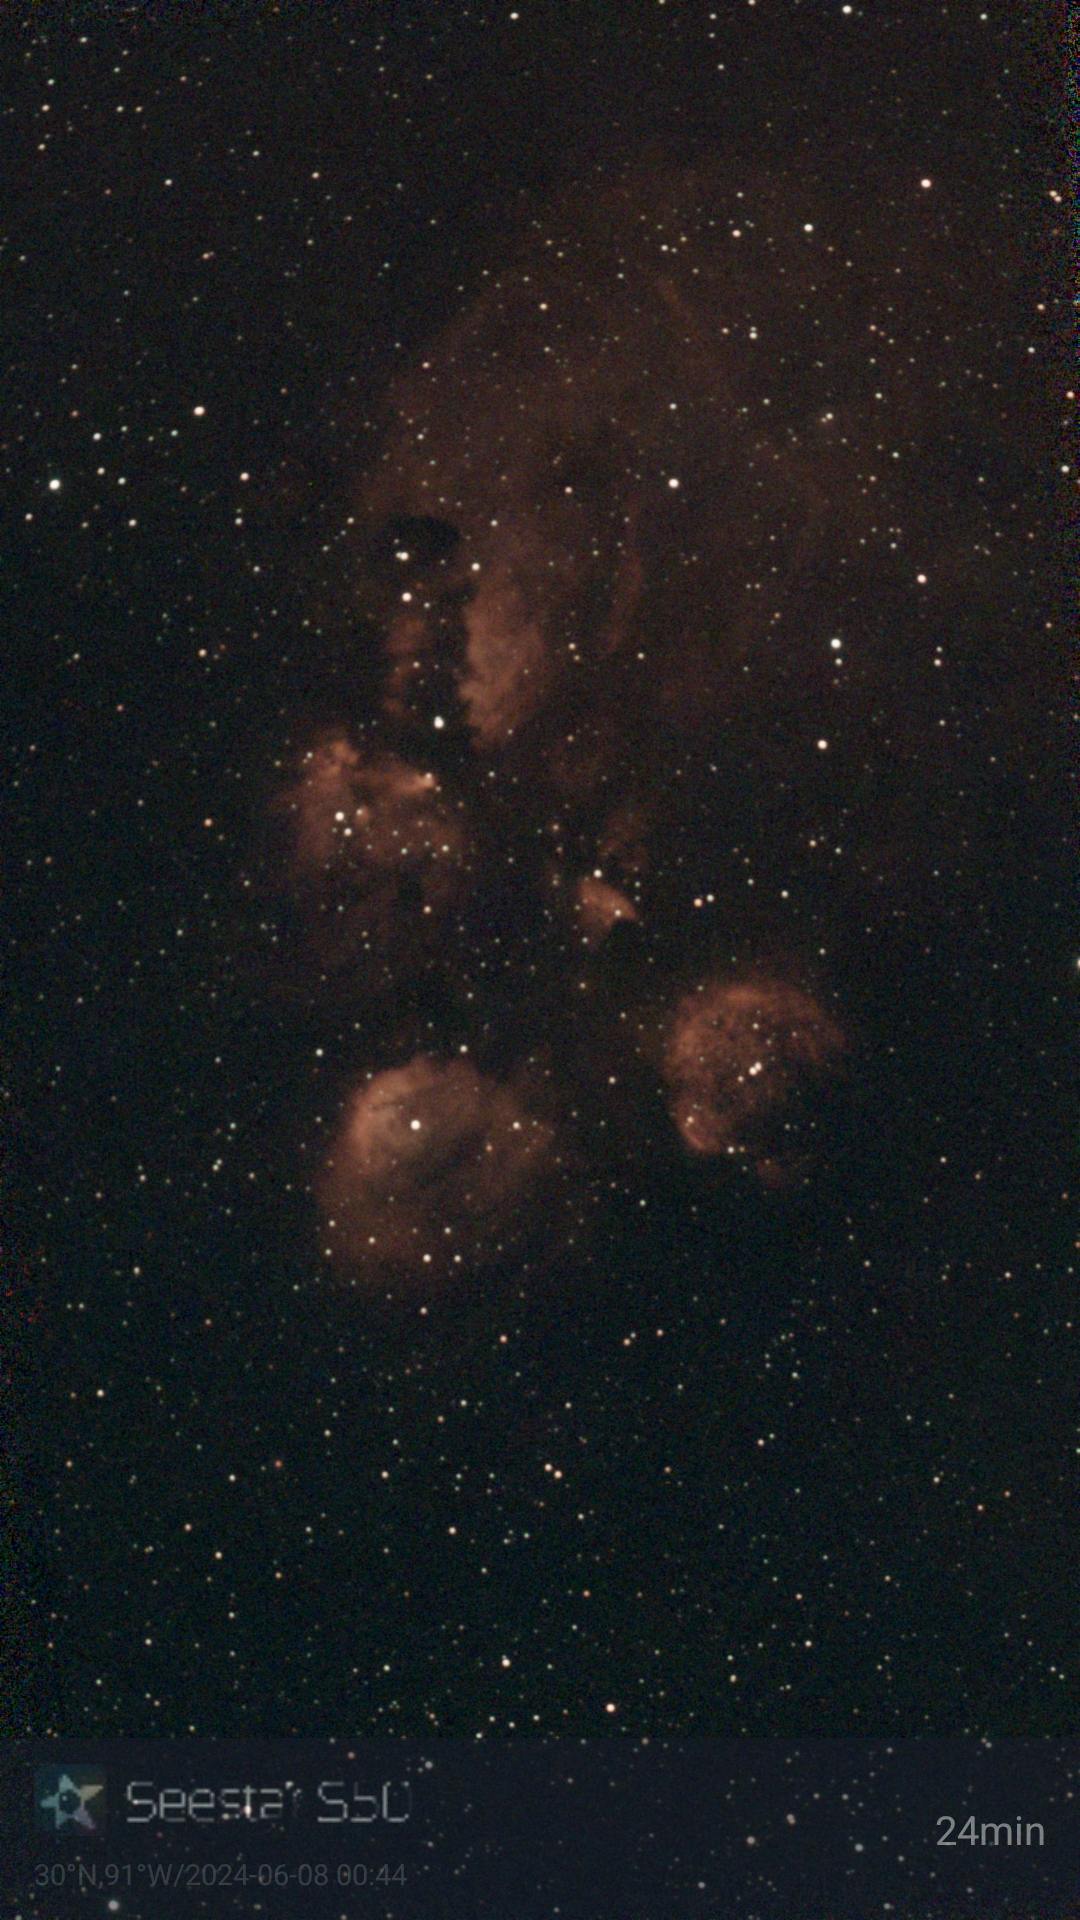
The last object I went after I had never seen or heard of before. It was listed in the Seestar app as being above the horizon, so I gave it a shot. It was so cool looking, I tried point my big scope at it to image it with the DSLR, but the object was not in the Skyportal app library. My astronomer friend suggested that was probably because Celestron wants you to buy the premium SkySafari app, which has a much larger library. I haven’t done so, yet, but I probably will before I go out next time. The Seestar got it, though. Check out NGC 6334, The Cat’s Paw Nebula.
In the time it took my to capture about an hour of data from the Pinwheel Galaxy with my big scope, I managed to grab at least five images of various deep sky objects with the Seestar. Here was the result of my Pinwheel imaging. It didn’t come out nearly as well as it could have, because my darks, for some reason, didn’t have the same pixel count on the files as my lights and Deep Sky Stacker refused to stack them. I also skipped taking flats. I didn’t want to disturb the others at the site with a bright white light, and the mosquitos had started eating my back. It’s also worth mentioning the field of view for the Hyperstar I’m using is huge. The Pinwheel Galaxy might take up 1/20 of the actually image space. This makes zooming in necessary at the cost of resolution.

While this is probably my best image of the Pinwheel Galaxy so far, I have to consider how much of a pain in the butt it was to get it. Meanwhile, the Seestar tooks images all night without an issue. And the only setup I needed to do for it was to take it outs of its case, attached the tripod, put it on a small folding table, and connect my tablet to it. It even has its own power supply, which remained above 50% battery life after a night of imaging. My tablet used even less of its battery life.
The Seestar just rocks.
The planet parade is starting soon and I’m looking forward to being able to setup at my home and really give my ZWO camera some work. Saturn’s ring are about to flatten relative to us and disappear from view. And Mars should be pretty close for some decent imaging if the Saharan dust stays away.